


Copyright � Pixel Ellipsis
All Rights reserved
E-Mail: info@pixel-ellipsis.net
All Rights reserved
E-Mail: info@pixel-ellipsis.net


WED is Gamestudio's level editor. It resembles Qed, the level editor that was used to create the Quake levels. WED is more advanced, of course, but if you've ever played with Qed you will feel at home.
But let's assume that you've never worked with Qed. Fire up WED and you will see a set of windows that look like this:
But let's assume that you've never worked with Qed. Fire up WED and you will see a set of windows that look like this:
Working with the world editor - WED
There aren't too many things to look at, right? Well, this is exactly what an empty level is supposed to look like! Fortunately, things will change quite soon - and for the better ;)
Right click the top left window, and then choose Add - Add Hollow Cube - Large.
Right click the top left window, and then choose Add - Add Hollow Cube - Large.
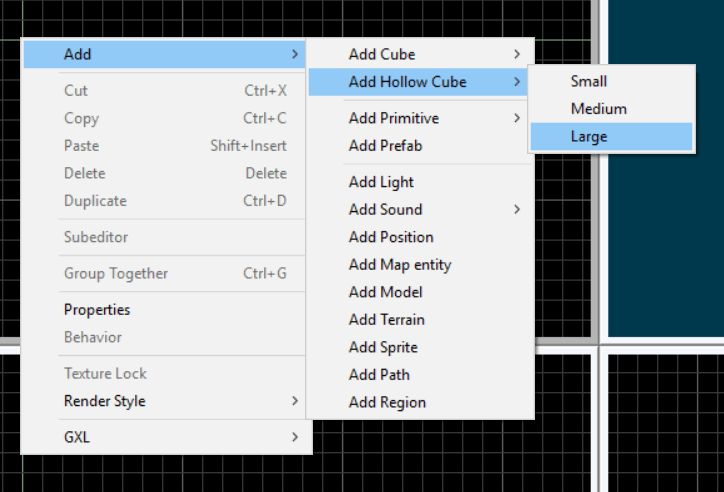
This will create a hollow cube, one that has thick walls, and place it in the level. Each level must be included inside a hollow cube; otherwise, our virtual world will not be rendered properly. Also, if you create an outdoor level, that hollow cube must use a sky texture.
Move the cube until it is perfectly centered in the origin. Click the "Move" icon from the top bar, and then drag the cube around until everything look ok. Here's what you should get:
Move the cube until it is perfectly centered in the origin. Click the "Move" icon from the top bar, and then drag the cube around until everything look ok. Here's what you should get:
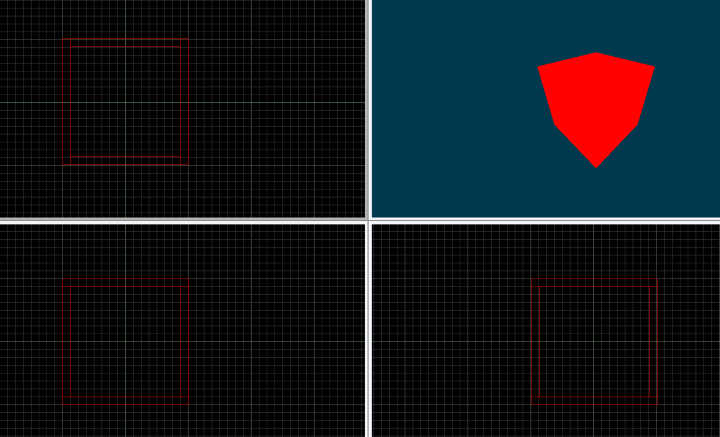
Want to create a larger level? Use the "Scale" button in the top bar, and then drag the cube until it has the proper size. Since it was already centered in the origin, you won't need to align it again. You will have separate control on both axis, so you'll also be able to create rectangular levels if you want to.
We need to paint those hollow walls; our cube is displayed using a plain red color for now. Follow the three steps in the image below to display the texture manager.
We need to paint those hollow walls; our cube is displayed using a plain red color for now. Follow the three steps in the image below to display the texture manager.
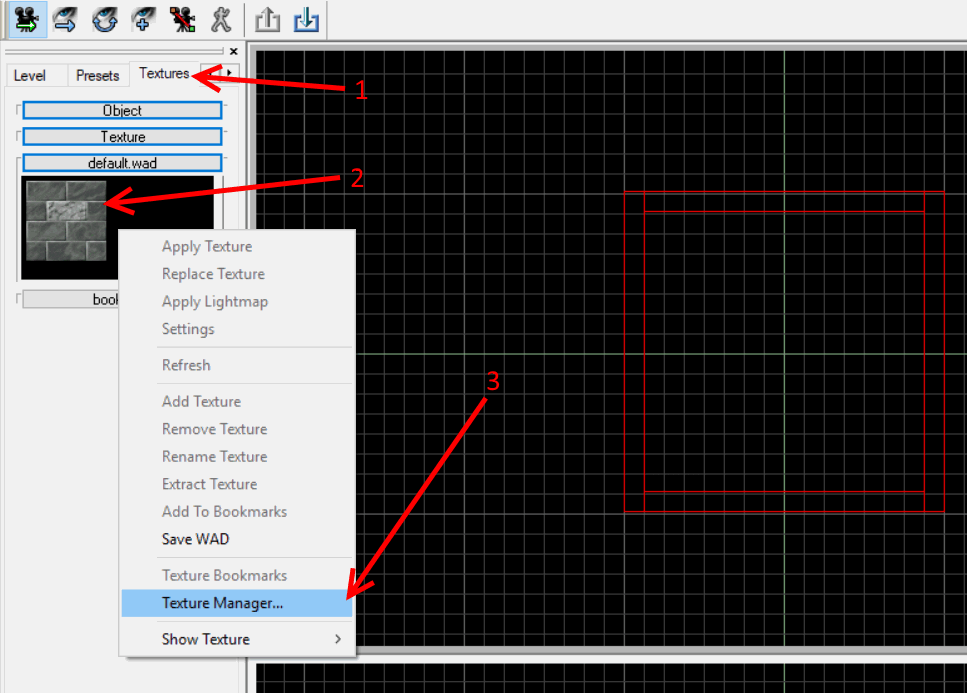
Gamestudio comes with a decent standard.wad texture pack. I've seen better textures, but that wad contains textures that are good enough for what we need here. If you want more, you can add your own textures to it.
Select the hollow cube, and then double click the desired texture in the wad file; the walls should now be painted using the texture you've chosen.
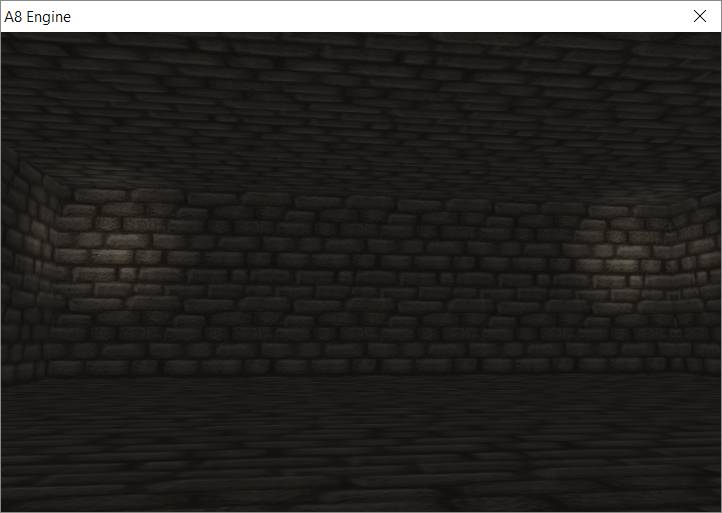
Aren't you curious to see how your level looks like? Press "Build", hit "OK", and then press the "Run" button. Here's what I have gotten.
Select the hollow cube, and then double click the desired texture in the wad file; the walls should now be painted using the texture you've chosen.
Aren't you curious to see how your level looks like? Press "Build", hit "OK", and then press the "Run" button. Here's what I have gotten.
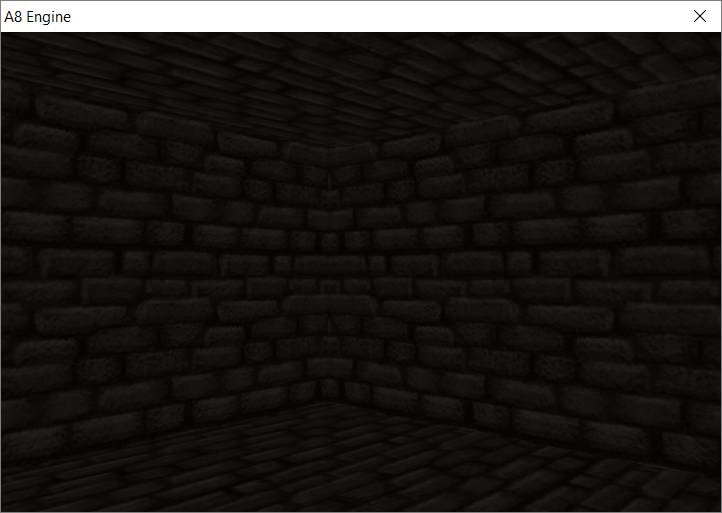
The level is a bit too dark, I'll give you that. But don't just throw lots of lights inside it, because you'll ruin the level! It is much better to add lights that have a small range, so they'll only illuminate certain areas.
Right-click the top left windows, and then choose Add - Add light. By default, WED adds a light that has a huge range, so you will want to minimize it.
Add two lights that have a range of 100 quants (Gamestudio's own range measuring units) near the corners. Here's what I have gotten.
Right-click the top left windows, and then choose Add - Add light. By default, WED adds a light that has a huge range, so you will want to minimize it.
Add two lights that have a range of 100 quants (Gamestudio's own range measuring units) near the corners. Here's what I have gotten.
You should also add two torch models near those corners, get it? This way, the lights will come from a naturally looking light source.
Gamestudio comes with a huge library of prefabs, which can speed up the level building process significantly.
Right click the top left window as usual, and then choose Add - Add Prefab to see the entire library, which includes hundreds of different prefabs. Click the + sign to expand the prefab folder, and then add the desired prefab to the level.
Don't forget to build and run the level after each change; otherwise, you won't be able to see how the updated level looks like.
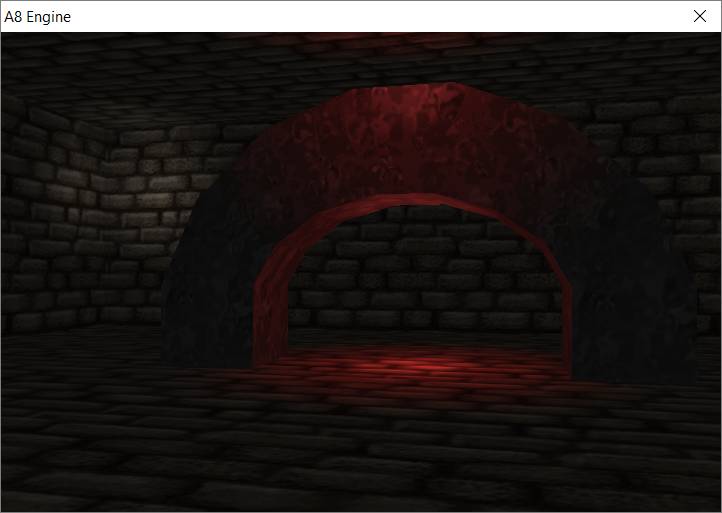
And this, my friend, is our new level version. It includes an arch prefab and two red lights. I'd say that it looks quite cool!
Gamestudio comes with a huge library of prefabs, which can speed up the level building process significantly.
Right click the top left window as usual, and then choose Add - Add Prefab to see the entire library, which includes hundreds of different prefabs. Click the + sign to expand the prefab folder, and then add the desired prefab to the level.
Don't forget to build and run the level after each change; otherwise, you won't be able to see how the updated level looks like.
And this, my friend, is our new level version. It includes an arch prefab and two red lights. I'd say that it looks quite cool!
I hope that you have enjoyed this tutorial and you're ready to experiment with WED, now that we have covered the basics together. As always, your feedback motivates me, so if you want more tutorials keep those requests coming! Don't forget that I don't have the time to code full games for you, though.